22 July, 2010

Mom Time: Boeuf Bourguignon

I did it!  I have always wanted to make it, and now I can say I have.  And let me tell you, it's 100% worth every effort...EVERYONE loved it!

I took some pictures to try and give you an idea of how the recipe follows.  Some moments were tricky to interpret, but you get the hang of it quickly.

The first step is to cut the chunk bacon into lardons, separated from the rind.  I could not find chunk bacon, so I bought a chunk of Pancetta.  Let me tell you, the flavor was WONDERFUL!


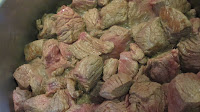
After cooking, you simply remove and reserve.  You'll end up using both throughout the process.


DRY your meat before cooking!  It will not get that nice brown tone without it being dry!


Carrots, onions, and garlic saute in the fats from the bacon and meat.  GOOD flavor.


Put beef and bacon back into the pot with the sauteed veggies.  Eventually you discard these onions and carrots.  Some like to keep them for a more Earthy/rustic taste and texture.


Wine, broth, paste, herbs to simmer.  Your house will begin smelling AMAZING right about now!


White pearl onions with the herb sachet.  These little beauties taste so delicious once caramelized.  Little bits of heaven.


Brown the mushrooms....DON'T crowd! It's true!  Do in two batches if your pan isn't big enough, but don't crowd them for nice browning.


Putting it all together after HOURS of baking.  Oh my heaven, my house had the most wonderful aromas.  At this point, you're done.  We opted out of putting over a carb...and it was divine.  The mushrooms and the onions were the perfect compliment to the most tender beef.  Just like in the movie, I put the first bite into my mouth and uttered..."yum".

Not the greatest picture, but you get the idea....smiles!  That means job well done mom!  Now, go plan a day and make it!  You know you want to!

19 July, 2010

The 10 Do's of Thank You Note Writing

1.  Send the thank you note right away, or as soon as you are able.  Don't let too much time go by before letting someone know what they did meant something to you.

2.  Informal stationery is perfectly acceptable for a thank you note, EXCEPT for a wedding.  Use a nice wedding stationery for your thank you notes.

3.  Use the giver's name or title!  Often overlooked in many thank you notes, as we are in a hurry just to get it written and send.  The salutation starts it off right.

4.  Identify clearly what you are thanking them for and how it will be put to use...express your gratitude for it.  If it's money, don't define the amount, simply thank them for their gratitude.

5.  Address your envelope to the specific people who gave the gift.  If it was a family, address it to the head(s) of household.

6.  Everyone who has sent either a personal note, flowers or some other form of a gift should get a written thank you. If you are unable to write the notes, a close friend or family member may write them on your behalf.

7.  Send a thank you note after receiving wedding/bridal/baby shower gifts, holidays/birthdays/bar-bat mitzvah/graduation/other gifts, condolences in any form written/flowers/donations, when someone has treated you to dinner/concert/event, after an interview, or just when you feel the urge!
8.  ALWAYS try to use an original thank you note for each person you send to, instead of using a pre-printed form style thank you where you insert a name, the gift, and sign your name.  For children, this is acceptable as they are learning to write and learning the etiquette. 

9.  Beyond thanking people for the gifts they gave you, make sure to write thank you notes to those who threw the event for you, or helped plan for the event.

10.  Multiple gifts from one person, mention each gift specifically.  Don't say "Thank you for the gifts".

We recently released some city skyline note cards that are perfect for thank you notes!